> ## Documentation Index
> Fetch the complete documentation index at: https://paylink.mintlify.site/llms.txt
> Use this file to discover all available pages before exploring further.
# Quickstart
> Get started with PayLink SDK quickly
# PayLink SDK Quickstart
🚀
Get started with the PayLink SDK in minutes. This guide will walk you through setup, configuration, and your first payment processing.
## Before You Begin
You'll Need:
- ✅ Python 3.8 or higher
- ✅ A PayLink account with API access
- ✅ Payment provider credentials (e.g., M-Pesa)
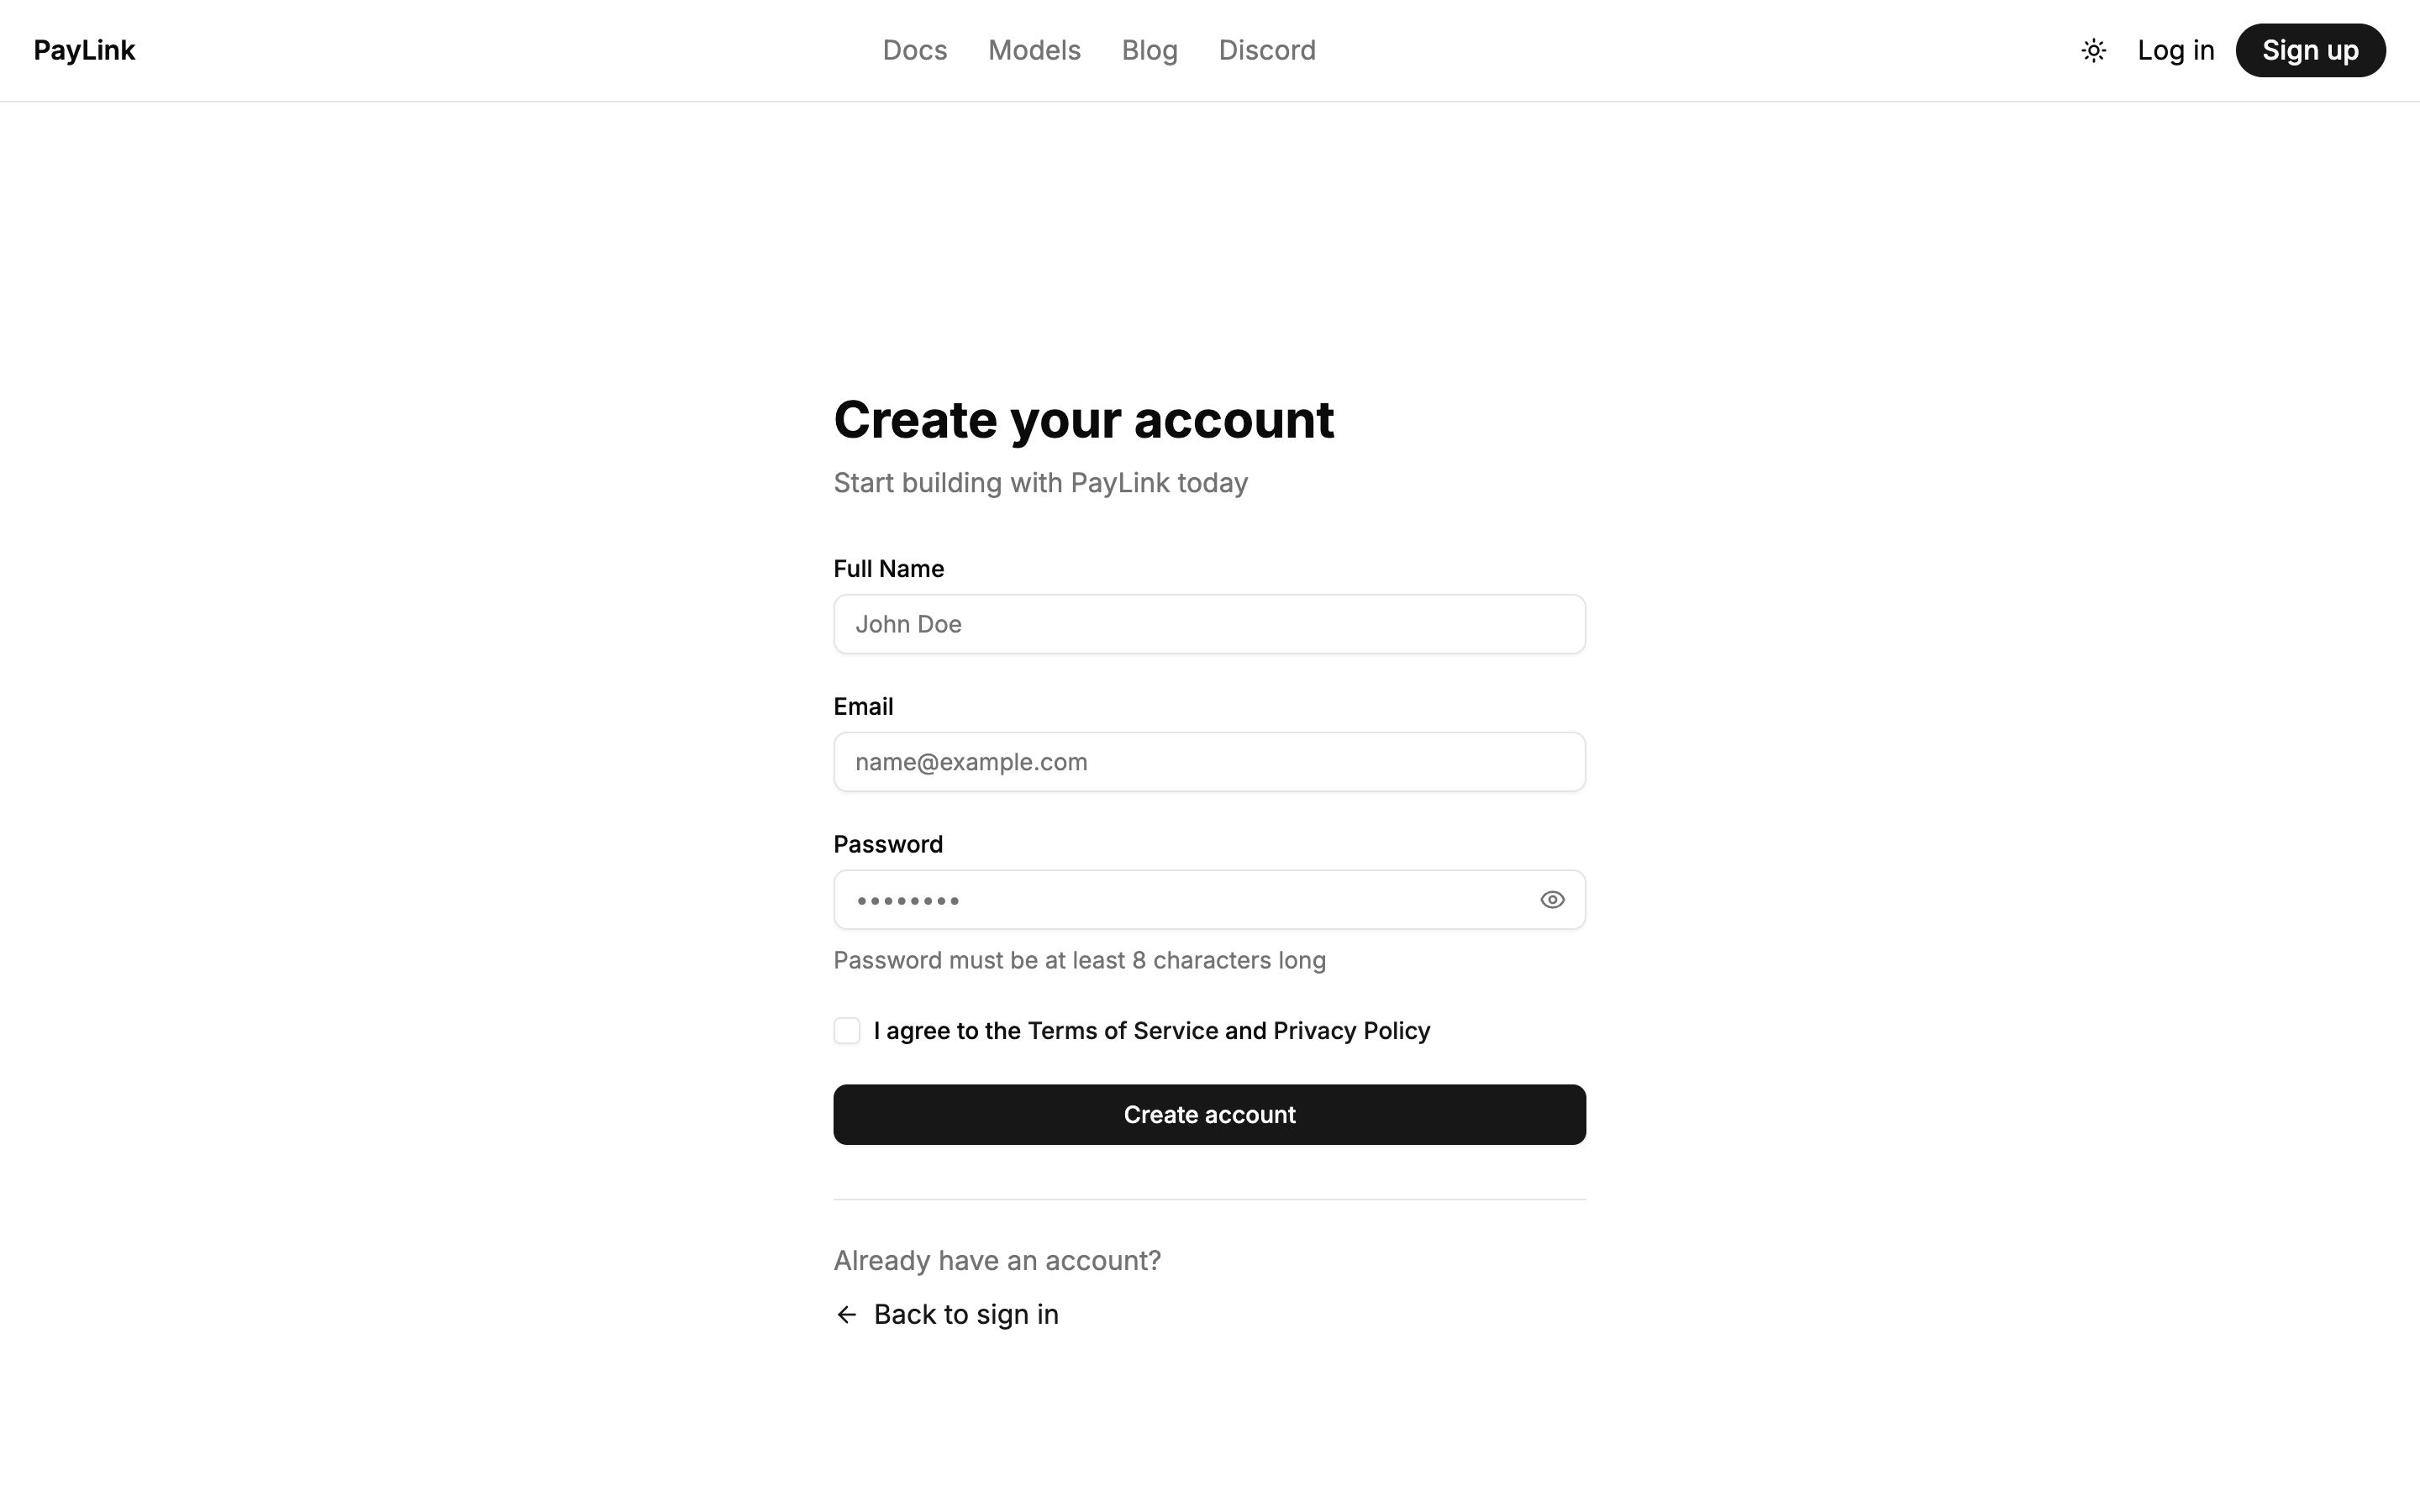
## Step 1: Set Up Your PayLink Account
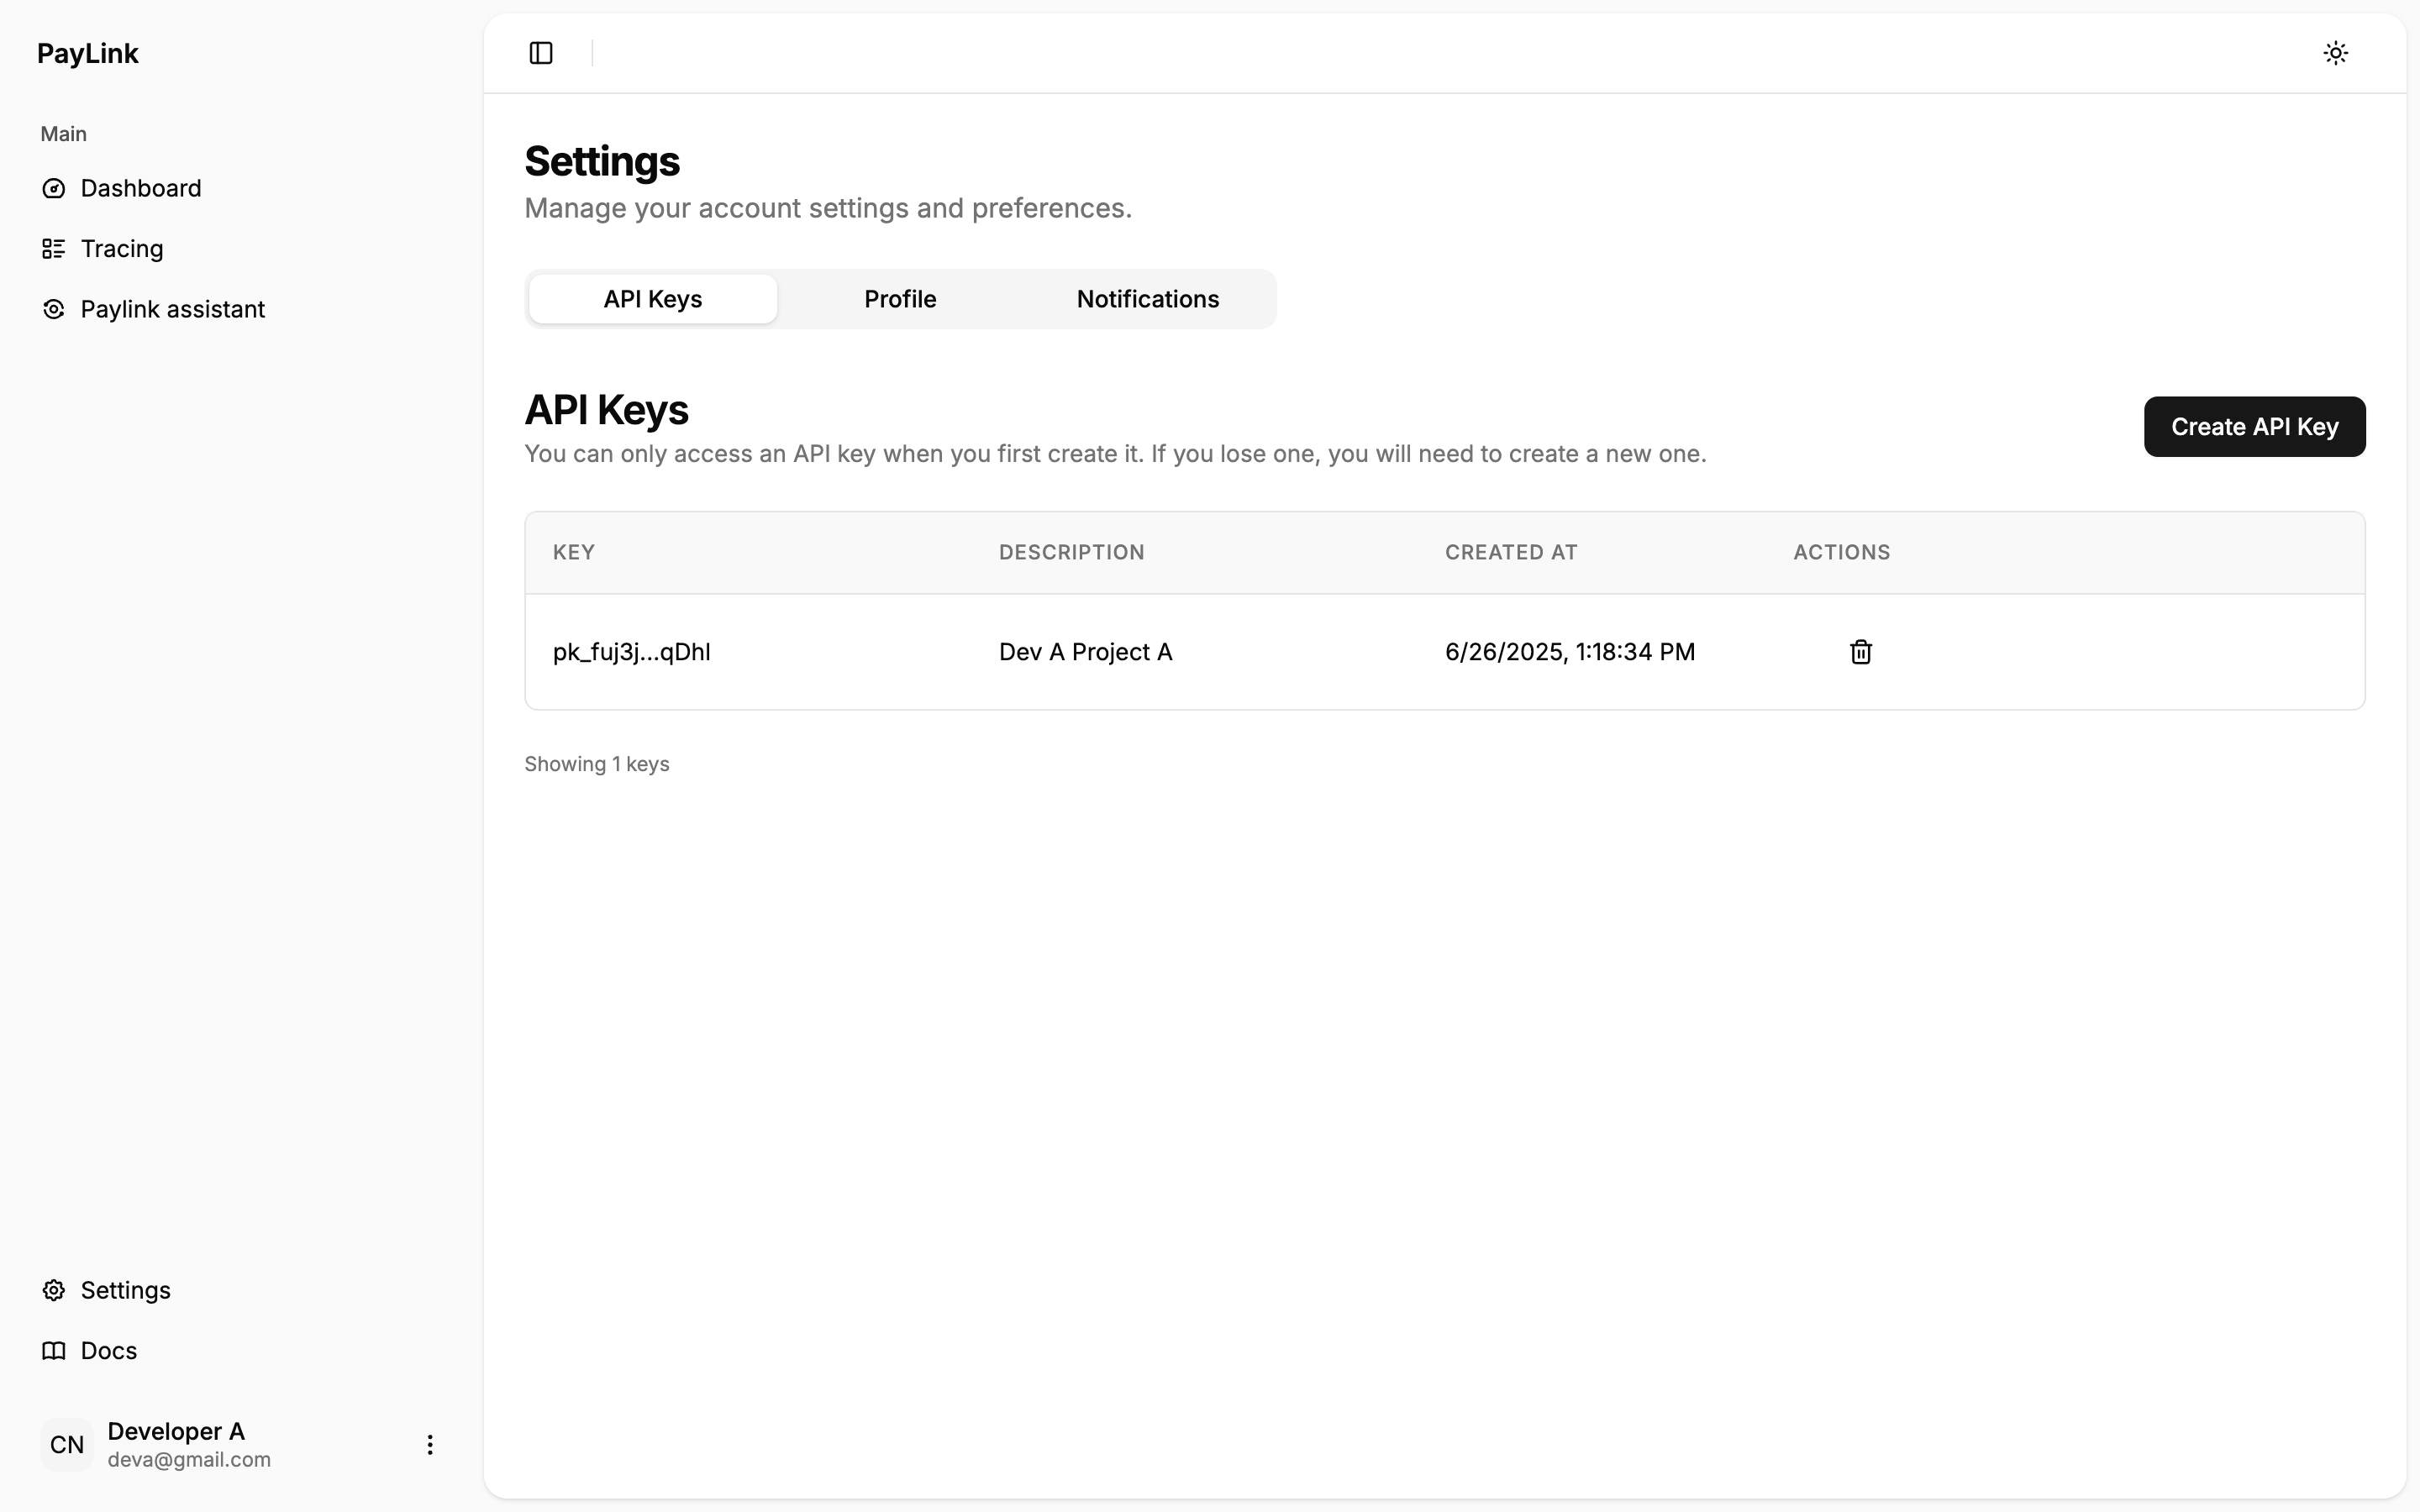
2. Generate Your API Key
After signing in, navigate to Settings and generate your API key.
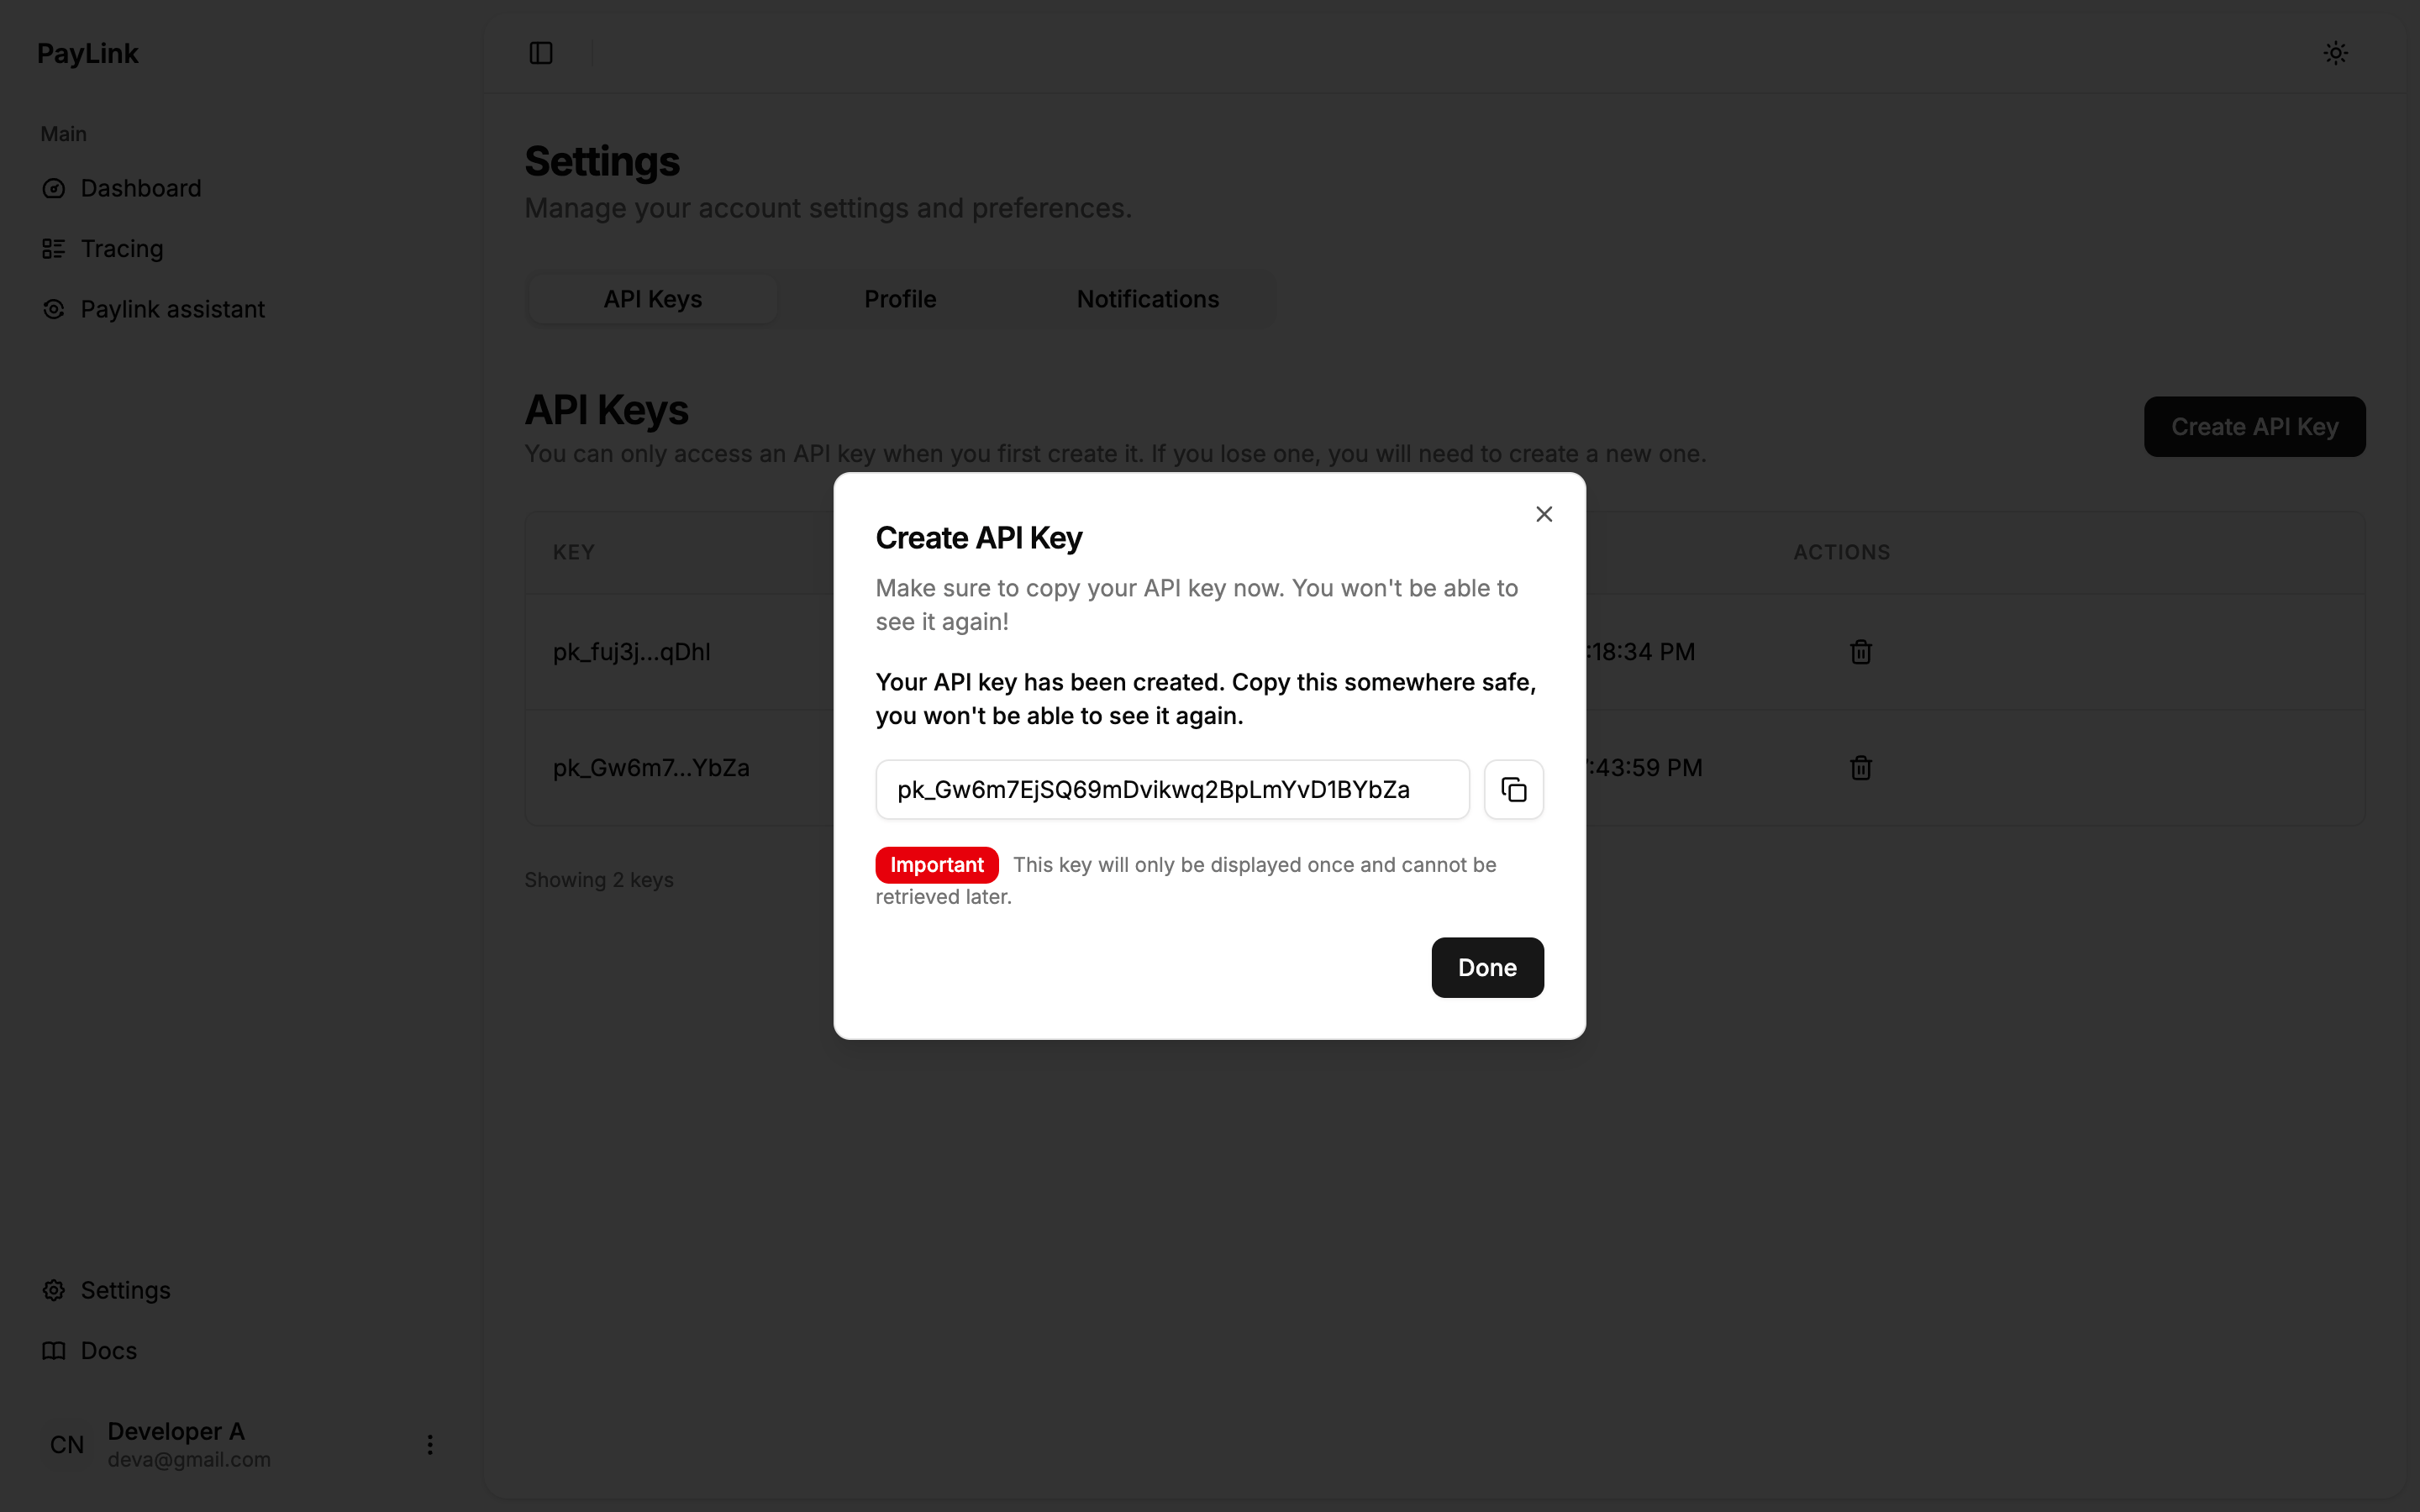
3. Copy Your API Key
Copy your API key from the dashboard. You'll need it for your integration.
## Step 2: Configure Environment Variables
Create a .env file in your project root with your PayLink credentials:
You can create a project on the PayLink platform and use the same name or just specify your preferred name under PAYLINK\_PROJECT and PayLink will create the project automatically.
```bash theme={null}
# PayLink credentials
PAYLINK_API_KEY=your_api_key_here # From your account dashboard
PAYLINK_PROJECT=your_name # From project settings
PAYLINK_TRACING=enabled # Optional for debugging
PAYMENT_PROVIDER=["mpesa"] # JSON array of providers
# M-Pesa specific settings (if using M-Pesa)
MPESA_BUSINESS_SHORTCODE=your_shortcode
MPESA_CONSUMER_SECRET=your_consumer_secret
MPESA_CONSUMER_KEY=your_consumer_key
MPESA_CALLBACK_URL=your_callback_url
MPESA_PASSKEY=your_passkey
MPESA_BASE_URL=your_base_url
```
## Step 3: Install the SDK
Run this command in your terminal to install the PayLink SDK and its dependencies:
```bash theme={null}
pip install paylink-sdk python-dotenv
```
Note: This will install the latest version of the SDK. For a specific version, use pip install paylink-sdk==X.Y.Z
## Step 4: Set Up a Basic Client
Create a new file named client\_example.py with the following code:
```python theme={null}
import asyncio
from dotenv import load_dotenv
from paylink_sdk import PayLinkClient
# Load environment variables from .env file
load_dotenv(override=True)
async def main():
# Initialize the client - it will automatically use your .env variables
client = PayLinkClient()
# List available tools
tools = await client.list_tools()
# Print available tools
print(f"Available tools: {tools}")
return tools
if __name__ == "__main__":
asyncio.run(main())
```
Test Your Connection
Run this script to verify your connection to the PayLink server:
```bash theme={null}
# From your project directory
python client_example.py
```
If successful, you should see a list of available payment tools printed to your console.
## Step 5: Process a Payment
Process Your First Payment
Create a new file named process\_payment.py with this code:
```python theme={null}
import asyncio
from dotenv import load_dotenv
from paylink_sdk import PayLinkClient
async def process_payment():
# Load environment variables
load_dotenv(override=True)
# Initialize the client - it will automatically use your .env variables
client = PayLinkClient()
# Process a payment using M-Pesa STK Push
result = await client.call_tool("stk_push", {
"phone_number": "2547123456789", # Replace with actual phone number
"amount": 1, # Amount in your currency
"account_reference": "invoice", # Your reference
"transaction_desc": "invoice-123", # Description
"transaction_type": "CustomerBuyGoodsOnline",
})
print(f"Payment initiated: {result}")
return result
if __name__ == "__main__":
asyncio.run(process_payment())
```
Run the Payment Example
python process\_payment.py
ℹ️
In production, replace the example phone number with your customer's actual phone number. M-Pesa will send a push notification to this number requesting payment confirmation.
## Step 6: Check Payment Status
Verify Payment Completion
Create a file named check\_status.py to verify the payment status:
```python theme={null}
import asyncio
from dotenv import load_dotenv
from paylink_sdk import PayLinkClient
async def check_payment_status(transaction_id):
# Load environment variables
load_dotenv(override=True)
# Initialize the client - it will automatically use your .env variables
client = PayLinkClient()
# Check payment status
status = await client.call_tool("stk_push_status", {
"checkout_request_id": transaction_id
})
print(f"Payment status: {status}")
return status
if __name__ == "__main__":
# Replace with your transaction ID from the previous step
transaction_id = "ws_CO_12052025033128264797357665"
asyncio.run(check_payment_status(transaction_id))
```
Run the Status Check
python check\_status.py
🎉 Next Steps
Now lets move on to how to view your tools in the PayLink dashboard:
- View your tools in the PayLink dashboard